Parts list
- 2 metal dowel rods
- 1 drill bit that makes a hole large enough for the metal dowel rods
- 10 large plastic clamps and 1 or 2 large metal clamps
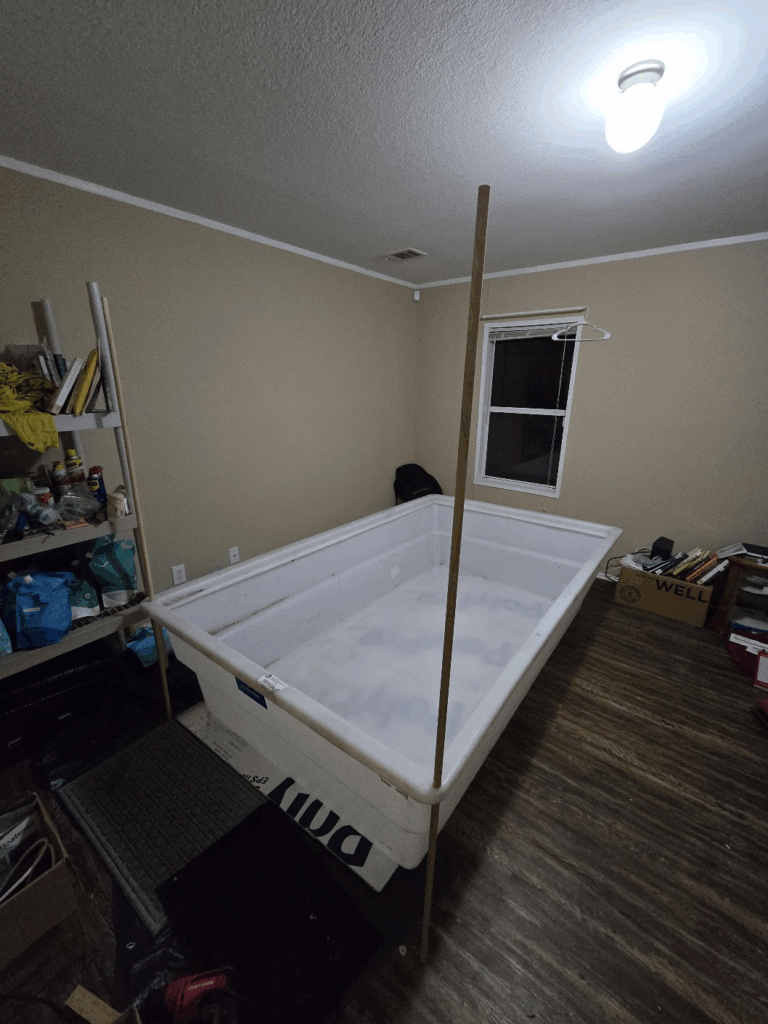
- a containment tank. I have an 8’x5′ 325 Gallon Poly Open Top Containment Tank … it needs to have a nice wide lip so you can drill in it.
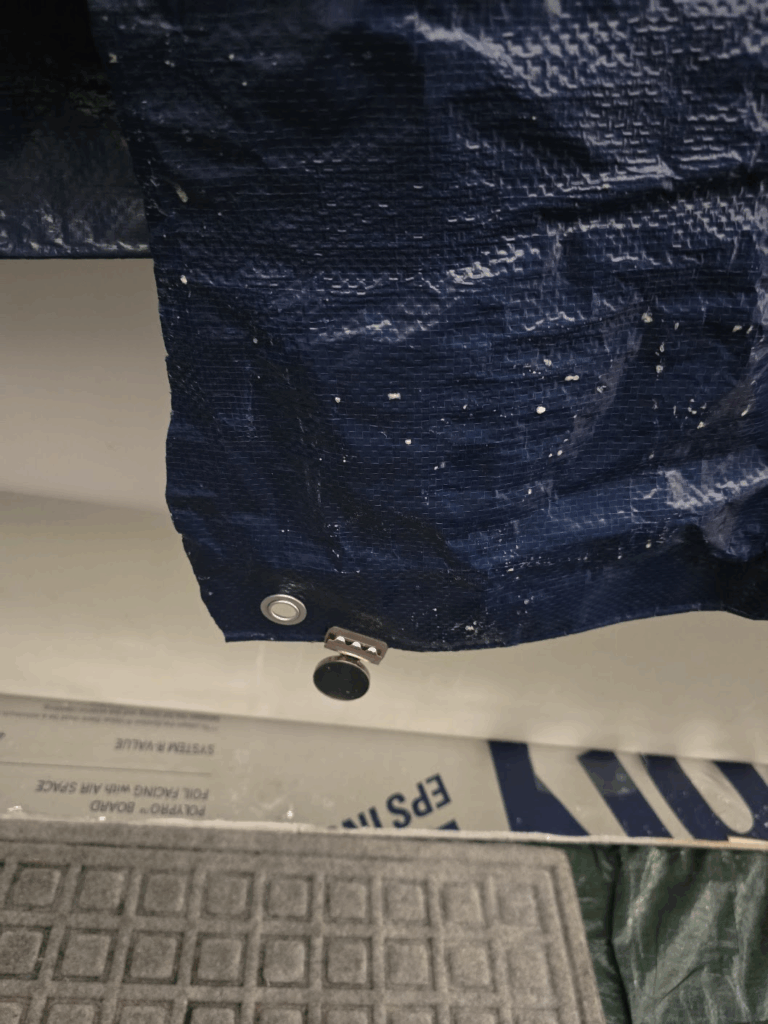
- a tarp (10′ x 12′). The thicker and more heat-reflective the better. But I have just a medium weight one with no heat reflection. Materials needed for Door formation in the tarp will depend on how you make a door in your tarp. In my case, all I needed was a box cutter and a magnetic bulldog clamp.
- TARARIUM 660GPH Aquarium Fish Tank Filter – not ideal. A filter with 1500gph or 2300 to 2600gph aquarium/pond filter is preferred.
- Water heaters:
- A bucket heater for the initial heating of water to 140 deg F or hotter so that salt dissolves easily. These are not typically saltwater proof, so they only have use the first time you fill the tank.
- 1 1000w or 1300w AQQA submersible heater –
- Heattrak snow melting mats or Thermal Guardian waterbed heaters. If you get snow melting mats then you need a temperature controller – Inkbird is cheap and effective and can control 2 heating units.
- a drip mat of some sort. I like diatomaceous earth mats
- GFCI adapter
- An extension cord that allows you to control multiple plugs via independent switches. This makes it easy to turn on/off the heaters and filters in and under the tank. For those into passive heating, you can unplug one place to make sure everything is off before entering.
- 800 pounds of epsom salt.
- Battery acid hydrometer from an auto parts store.
First things first – room considerations
The room you put the tank in has to have a level floor. Use a tool to insure that the floor is level horizontally and vertically. I used a mobile app for this purpose, but hardware stores have devices for the same purpose.
Next, put down insulation and your drip mats:
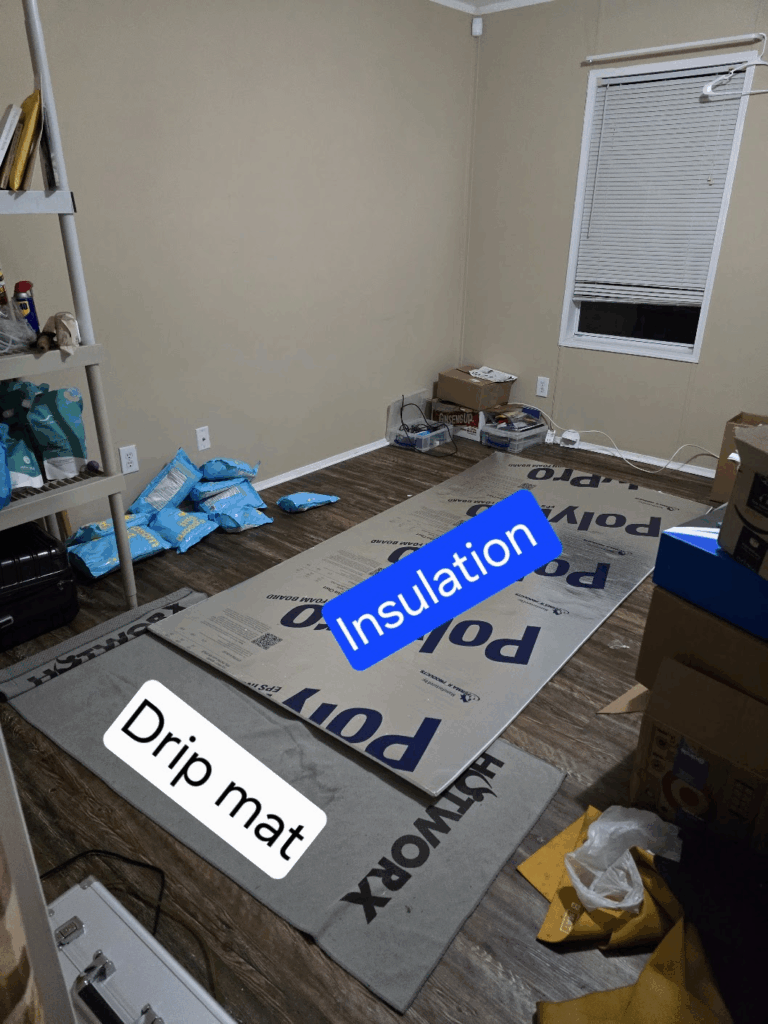
Then put down your under-tank heaters:
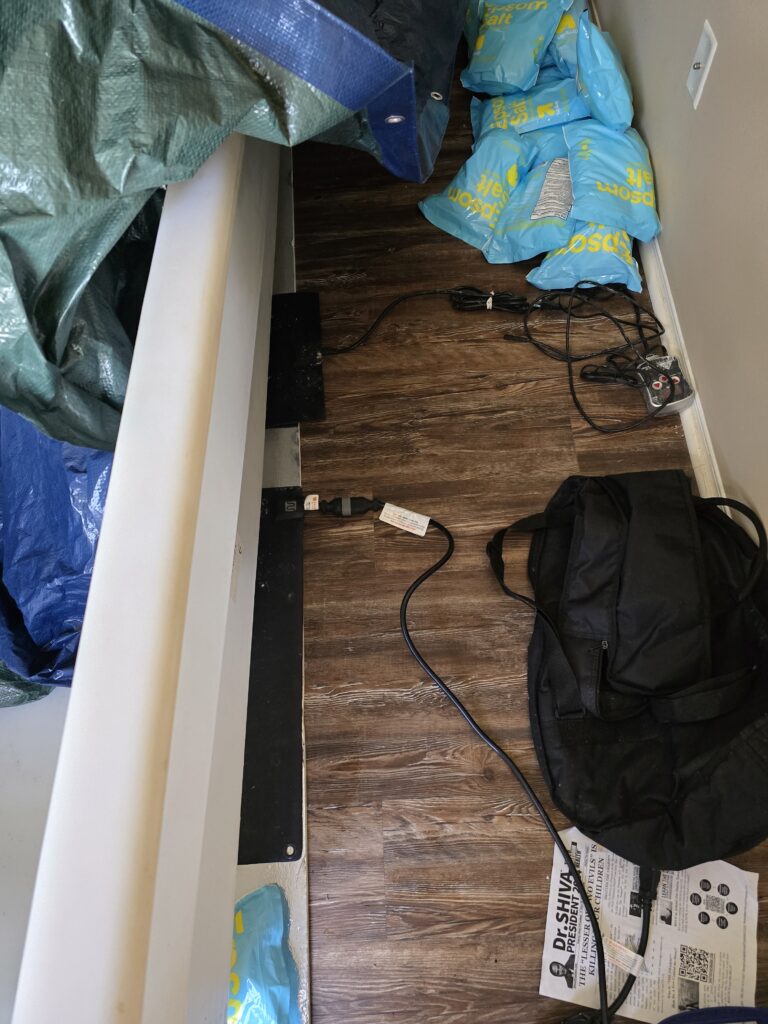
I think snow melting mats are the most amazing thing out there. But waterbed heaters held down the fort for many years before snow melting mats came into vogue. An inkbird temperature controller will work.
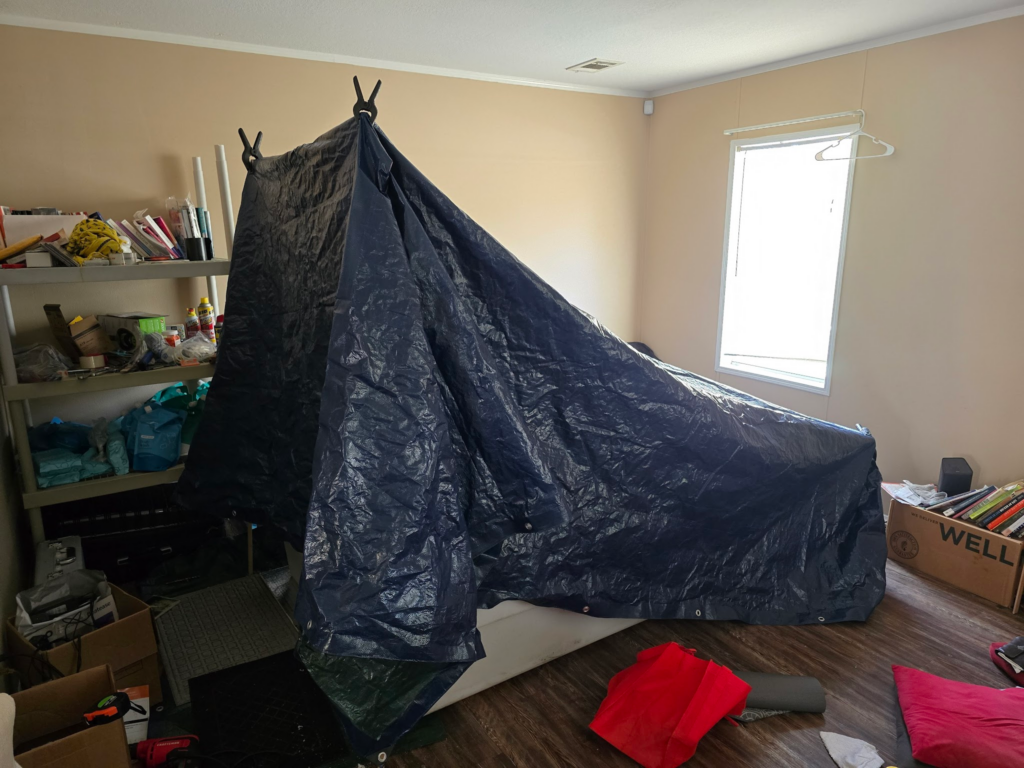
Put the containment tank on top of the heaters
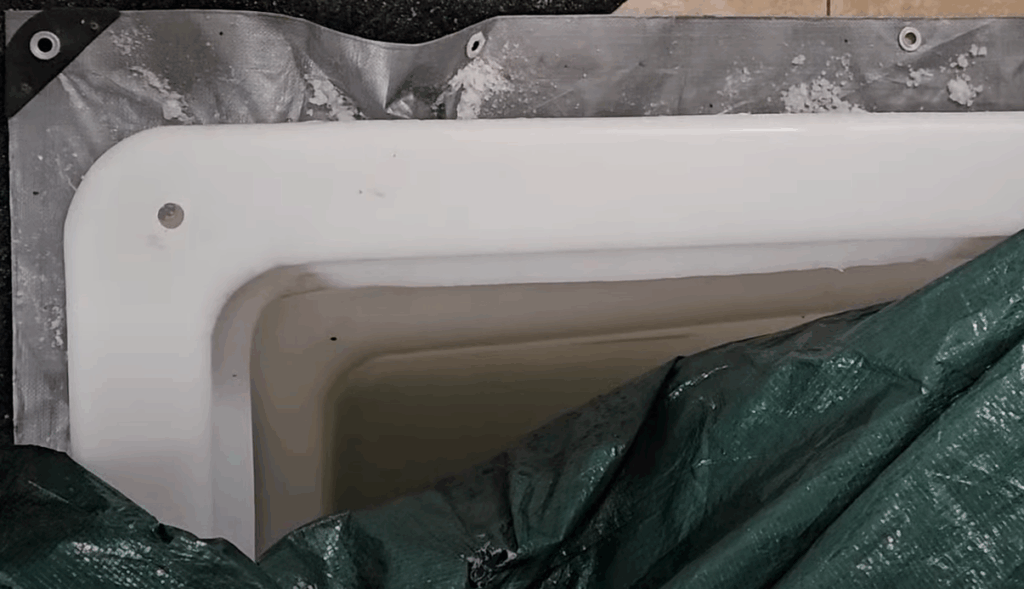
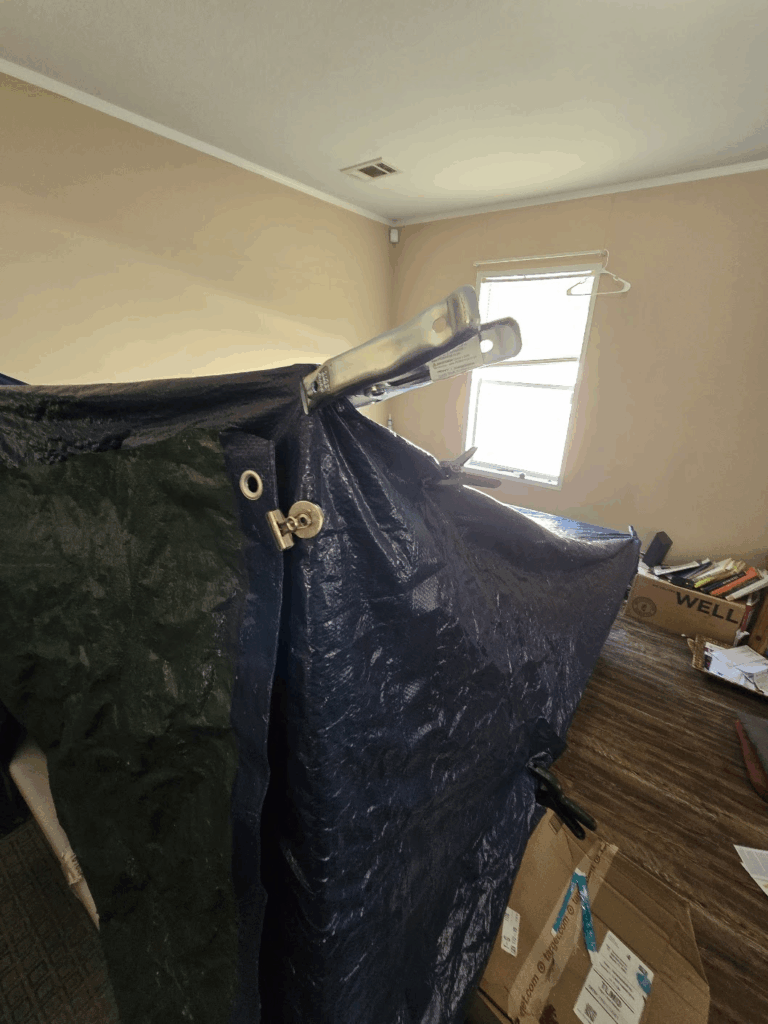
the 8’x5′ containment tank must have a nice lip on it so that you can …
drill 2 holes large enough for the metal dowel rods to fit through
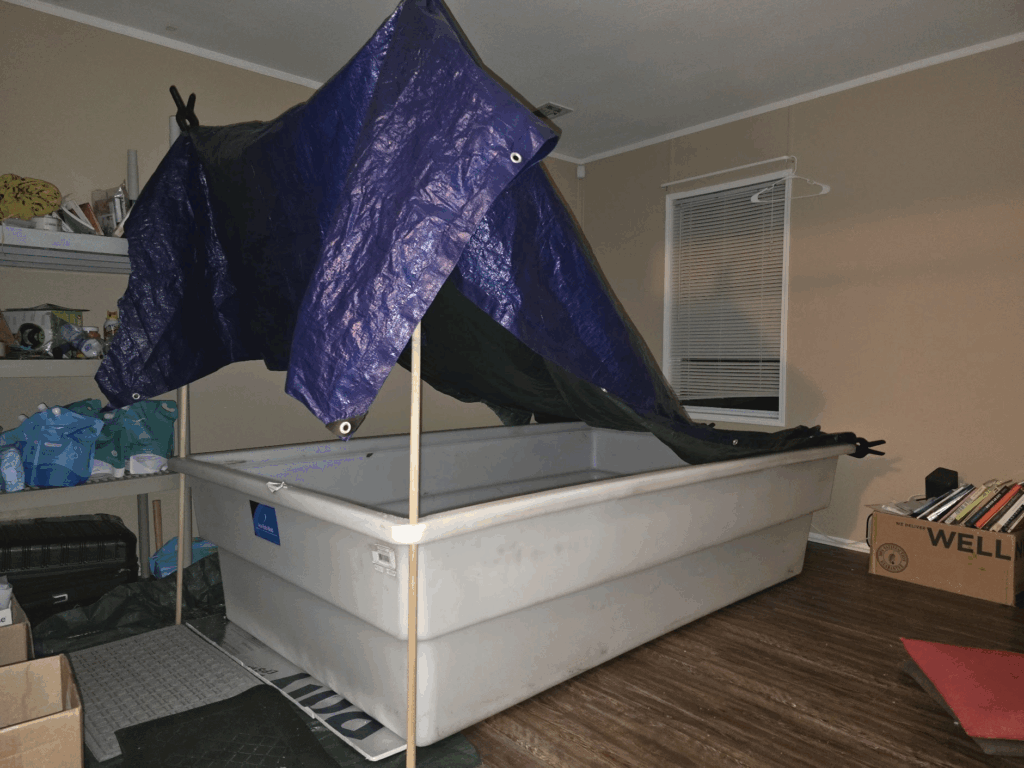
Use metal dowel rods to raise the tarp
take metal dowel rods and run them through the front 2 holes in the lip of the tank so that the tarp is raised. Raising the tarp achieves two things. First it allows water to run off (like an Oasis tank) instead of droplets getting in your eyes. Second it provides more breathing room, which reduces claustrophobia and eliminates the occasional sense of suffocation I experienced in the Ragtop DIY tank.
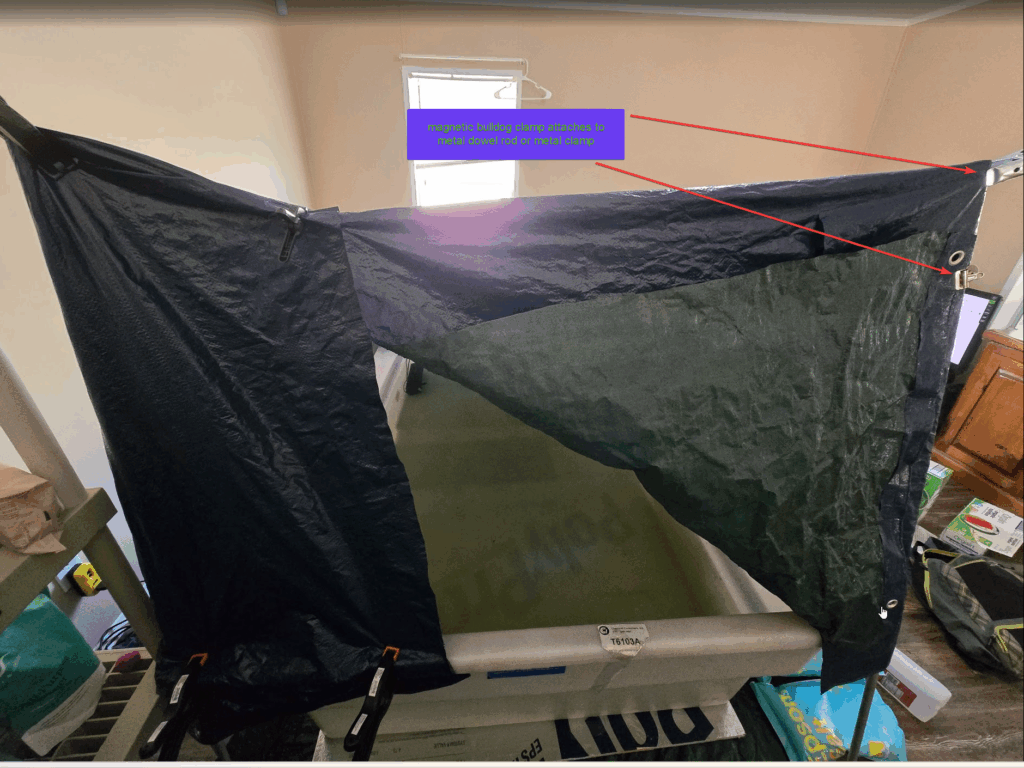
The reason metal rods are used is so that a metal bulldog clamp can form a door: when you pull up the door, it can magnetically clamp to the rod or the metal clamp
Use clamps to pull the tarp tight to the lip of the tank and to the dowel roads
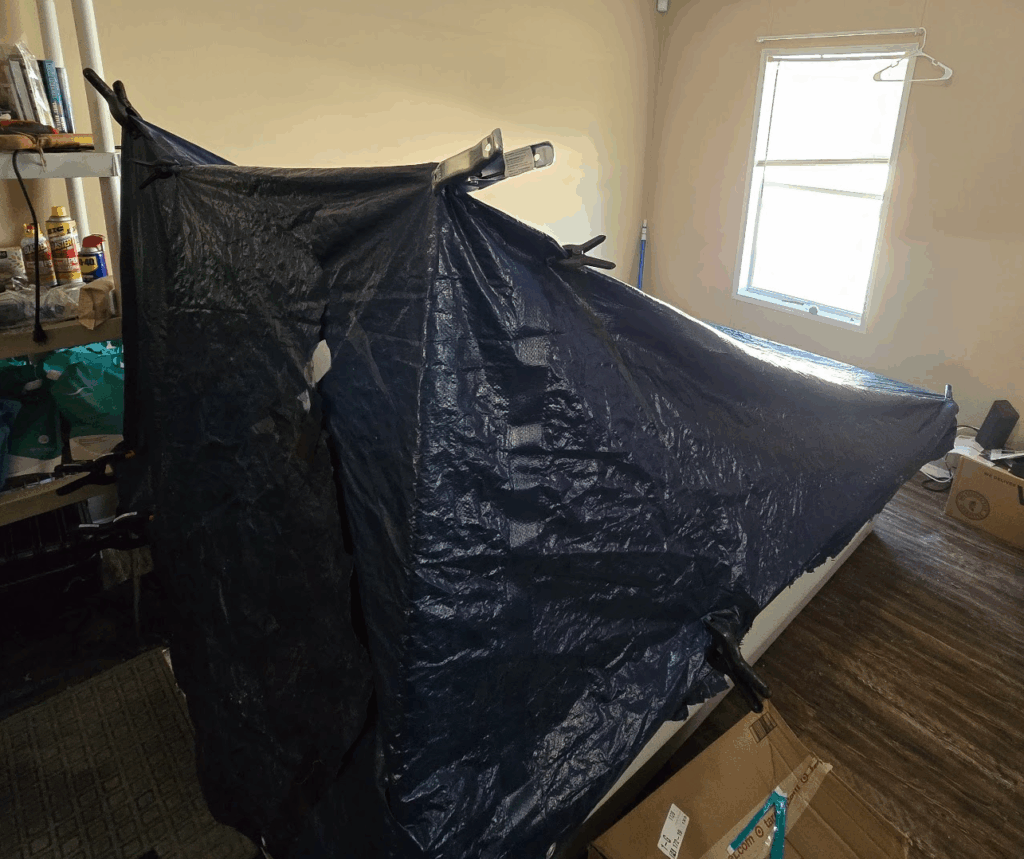
Normal clamps are fine everywhere. But as you can see, a metal clamp is used on the dowel rod so that the magnetic bulldog clamp can attach to it… or the dowel rod… this reduces the accuracy needed when building the door.
Then build a door
Building a door was a rather random act of luck. I had looked at two-sided tarp zippers and considered using one but the standard ones were quite long. and they would need to be marine grade. Custom zippers measuring 3 feet would be more appropriate but I didnt see any that were marine grade.
I also debated whether to make two vertical slits and raise the tarp over the top. A design worth considering further.
I figured two slits in the tarp and then raising the tarp would be best.
But I settled on:
- one vertical slit in the tarp
- one magnetic bulldog clip at the bottom of the slit
- the door simply opens up and the bulldog clip attaches to the metal rod
Here’s a video demo of the door.
One aspect of this tank design presents a problem: if you notice the tarp sags from rod to rod. It would be nice to find someway to force a straight line from rod to rod.
Place your aquarium/pond filter into the far corner of the tank
you might also have a submersible heater so you dont put a lot of strain on your under-tank heaters.
Make sure to put the pump on a timer so you can circulate the water
as has been discussed elsewhere, the pump has 2 functions in an isolation tank.
Now, add epsom salt water
from Chapter 11 in “The Deep Self”
- heat the water to 140 deg F – perhaps using a bucket heater. Note that most bucket heaters are good for pure water, not salt water. So they are fine for your initial feel
- put in the salt – it dissolves easily at this high temp
Happy Floating!
Well that’s all. The Tarp Mahal is an evolution of the ragtop DIY tank:
- it uses a slanted tarp design to aid condensation and increase available air and reduce claustrophobia
- it uses improved heating
- it uses improved filtering (though still not good enough. I just got tired of buying new things for this build).