
The Ragtop DIY Floatation Tank is
- an EASY TANK TO BUILD: Can you drill a hole in plastic? Can you put a zip tie through that hole? If the answer to these 2 questions is yes, then you have all the skills needed to build yourself a tank. And it should only take an hour to do!
- a CHEAP TANK TO BUILD: just a $600 containment tank and a tarp for 13 bucks are the main ingredients. Just over 1 grand when you add heating and filtration!


Design Criteria:
- Inexpensive – a grand or two and you’re done with spending.
- Easy to build – more like “snap together, done” – no sawing, measuring, nailing and all that jazz. All you need is a drill to make a few 3/8-inch holes and some 1/4-inch zip ties.
- Passive heating – no heating of the water while floating.
- Free and Open Source – every aspect of tank design is publicly disclosed.
Materials List
NOTE:
In the materials list, the first 5 parts are mandatory:
- containment tank
- tarp
- zip ties
- drill and drill bit
- water heating system
The filtration system is a moving target: The best ideas in this aspect of DIY tank design are rapidly evolving. I am certain my listed choices below are not ideal, as this blog post will reveal. Before buying any of the spa pack parts, it is advised to read this post and have a conversation with me (or some float tank discussion list) about the ideal spa pack (pump and filter system).
| Product | Picture | Amount | Cost | Description |
| 325 Gallon Poly Open Top Containment Tank | 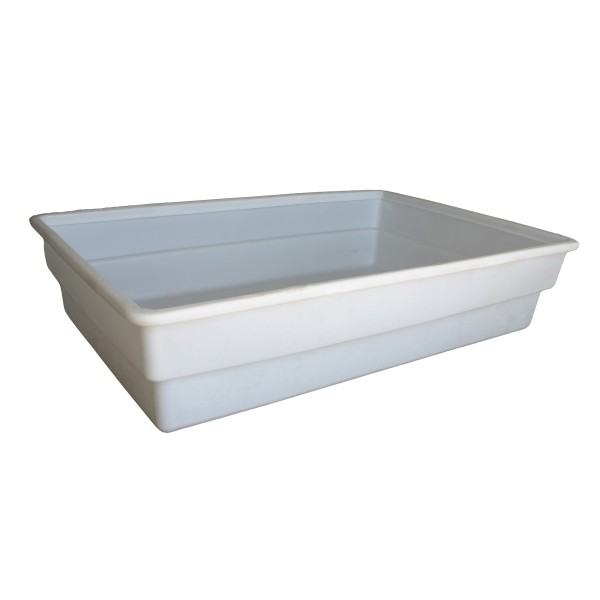 | 1 | $600 | 24-inch high containment tank. 8 feet long, 5 feet wide. |
| Tarp | 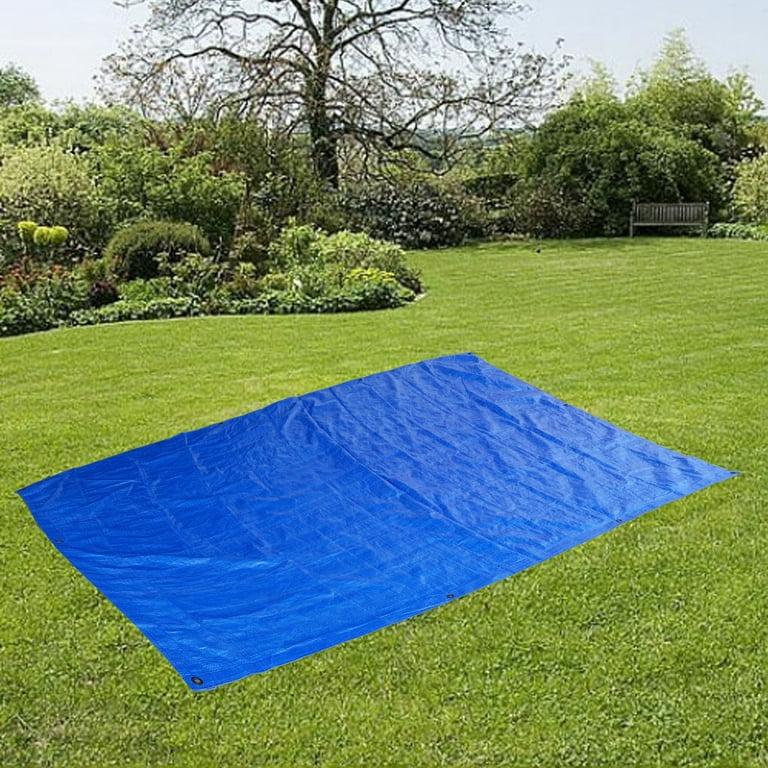 | 1 | $25 | To open and close the tank. Tarp should be 1 or more feet longer/wider than the tank on each side |
| 1/4″ Zip ties | 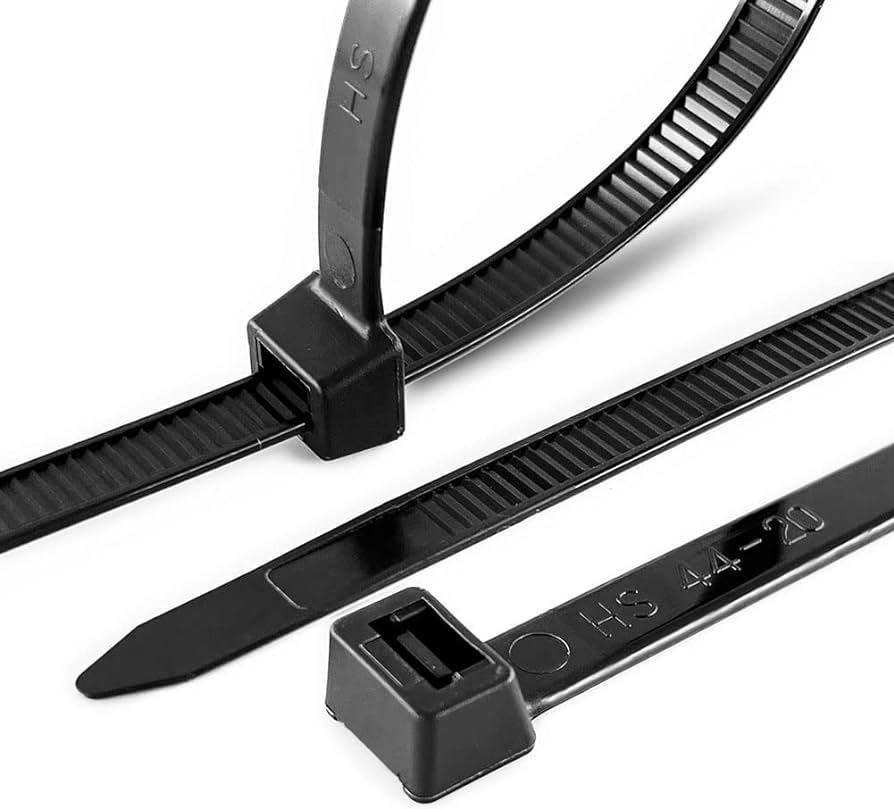 | 3 | $5 | The top of the tank is formed by running zip ties through holes in 3 sides of the tank |
| Power drill and 3/8″ drill bit | 1 | $50 | You put holes in the lip of the plastic and the tarp so you can cinch it tight with zip ties. | |
| H2Pro 1000 Watt Heater & IceCap Magnet Mount Package (marineandreef.com) | 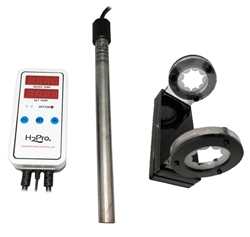 | $160 | Heating the water | |
| Lifegard Aquatics Quiet One Pro Model 5000 |  | 1 | $210 | Spa Pack – Pump |
| Inland Seas Nu-Clear Model 533 Canister Filter, 25 Micron Cartridge & Carbon Filter (marineandreef.com) | 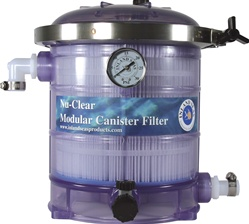 | $250 | Spa pack – Filtration | |
| Reducing Nipple 1″ x 3/4″ Polypropylene, black (marineandreef.com) | 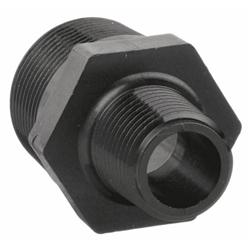 | 1 | $6 | Spa pack – plumbing connection necessity |
| UV Sterilization | I bought a Lifegard Aquatics UV sterilizer but was intimidated by the complexity of assembly. | 1 | $200 | Spa pack – Optional. See the discussion before purchasing. Pond UV sterilizers are recommended. |
| Hydrometer |  | 1 | $20 | Indicates the salinity of the water. Battery acid tester works well as a hydrometer for coarse measurements. |
| Total Cost | $1300 | Price does not include salt. |
Simple Build/Purchase Instructions
Put down the containment tank.
- Once the tank is loaded with salt, it will not be moving an inch. You need to choose a location so that the Northwest and Southeast sides of the tank have access to electrical outlets. As you can see from the picture below, Northwest is where the heating apparatus is placed and the Southeast is where the filtration system is placed.
- You may wish to insulate the floor with something like XPS Foam Board Insulation.
- Scrub the inside of the tank with hydrogen peroxide.
Anchor the tarp to the tank by drilling holes and zip-ties.

We need to drill holes in the plastic so that we can cinch the tarp to the tank. This video explains how to drill a hole to create an anchor point.
The previous iteration of this tank had a different location for position 3. The new location for position 3 allows for another hinge to be created.
At position 1, Put the tarp over one corner of the tank lip. Drill a 3/8-inch hole in the Northeast corner of the containment tank lip, driving the hole through the tarp as well as the plastic. Then put a 1/4-inch zip tie through the hole and tightly cinch the zip tie. Position 1 serves as the first anchor point for your tarp.
Now go to position 2 — the Southwest corner of the tank. Pull the tarp as tightly as possible. The goal is to reduce sagging in the middle of the tarp. Sagging in the middle of the tarp would lead to the tarp being on your face or body. But be careful – a tarp can tear. While holding the tarp as tightly as possible (without ripping it), drill a 3/8-inch hole in this corner of the containment tank lip, driving the hole through the tarp as well as the plastic. Then put a 1/4-inch zip tie through the hole and tightly cinch the zip tie.
Now go to position 3 and make a hole in the tank lip and the tarp and zip-tie corner 3 down as well.
Position 4 is another place where you are pulling very hard on the tarp in order to reduce tarp-sag. Position 4 forms about a 30 degree angle with the top lip of the tank with position 1 as the vertex. Position 4 cannot be too close to the northwest corner-lip of the tank: otherwise you wont be able to flap the tarp open and closed to get in and out. But if it is not close enough, then you run the risk of tarp sag. I would suggest that Position 4 be determined experientially: leave out this additional anchor point. Fill your tank with salt and heat the water and start floating. During each of your pilot floats, notice (1) how much tarp you need to open and close to enter and exit comfortably (2) where the tarp tends to sag. Then you will know where anchor point 4 needs to be based on direct experience. My anchor point 4 is 31 inches from the Northwest corner of the tank as this video shows.
I have 5 anchor points in my tarp as this picture shows:

Add water
10 inches of water is adequate. I currently have 11 3/8 inches of water in the tank. Adding very hot water from a shower makes it easier to dissolve the salt. It’s also faster because you dont have to heat room temperature water. Dont add salt and the water is hot – each bag of salt you add will plummet the water temperature temporarily.
Now, heat the water (AND BE CAREFUL)
To heat the water, we use a temperature controller.
BE DAMNED CAREFUL about what you plug into what. When I first got my heating system, I plugged the heating element directly into the wall instead of into the temperature controller and it started heating up without limit and I almost burnt the daylights out of myself. YOU HAVE BEEN WARNED. Read the freaking instructions and make sure you do it right. Or pay a serious price.
Make sure the water heating element is at least 2 feet from the temperature probe. Otherwise you will be getting a local read of the water temperature. I suggest putting the temperature probe as far to the Northeast as possible and the heating element in the center of the tank or along the west wall of the tank as far away from the temperature probe as possible.
Another thing to consider is how high or low the temperature probe should be. The room temperature affects the temperature of the top of the tank water. The floor temperature affects the temperature of the bottom of the tank water. Experiment with placement of the temperature probe and get back to me. My personal opinion is that since you are floating on the top of the water, you should be probing the temperature of the water near there… maybe 1 or 2 inches below the surface?
In terms of room temperature, I suggest 82 to 86 deg F. The thermostat in my apartment is set at 79. I am not against a room temperature of 93.5 deg F but have not personally experimented with that. I would love to, but my current living situation does not permit that.
Filter the Water
As stated above, choosing the ideal spa pack (pump and filter system) is a moving target. This section describes what sits here in my apartment. Later, we reflect on what woulda-coulda-shoulda happened.
I currently sanitize the water with hydrogen peroxide and nothing else. There is a Float Conference 2024 presentation on why h202 is not adequate. Too bad the presentation is not publicly available until they decide to release it.
In the initial build of this tank, I ordered a pre-configured spa pack that includes pump and filtration from Marine and Reef. The filtration part was fine: it included mechanical/particle filtration and carbon filtration. However, the Iwaki pump they include is gravity-fed (it cannot pump water vertically only horizontally or less than horizontally) instead of self-priming. I had ZERO interest in drilling holes in plastic and hoping that water would not leak all over creation. Remember, a design goal here is easy – a grandmother could do this if she wanted to. So even though I bought their pre-configured spa pack, I needed to return the Iwaki pump and get a pump that I could submerse, the Lifegard Aquatics 5000.
However, a person (Nexus Float) commented on my filtration video stating that the flow rate on my pump is too low… a strong pump with adequate GPM would suck surface particles into it.
Now, rumination over a better pump/filter system includes all blog posts from the category pump and filter. Some highlights:
- Barbara Cherington’s DIY tank – it’s attractive because it did not involve drilling holes. It uses a hayward pump and hayward filter along with Ozone. Nexus float commented that he has always been a pentair guy.
- DFT’s build is attractive to me for the same reasons – he did not drill holes to pump the water. He used a tidal wave pump.
Add Epsom Salt to the Water
The old adage of 1000 pounds of Epsom salt was fine for a tank that was 4 feet wide. But this baby is 5 feet wide. I think 1200 to 1500 pounds is closer to what is needed.
Once you have located a place to buy epsom salt in buik:
- where do folks buy epsom salt? : r/FloatTank (reddit.com)
- getting epsom salt in the USA : r/FloatTank (reddit.com)
- My personal epsom salt database.
And once you have a hydrometer:
A hydrometer is used to measure the salinity of the water. I paid 4 bucks for a battery acid tester. You can get one at a local auto supply store.
- Any experience with a battery hydrometer? : r/FloatTank (reddit.com)
- Confused about specific gravity for new float tank : r/FloatTank (reddit.com)
The finest hydrometer in the world is the Tilt, made by Superior Float Tanks. It’ll run you $200.00.
Then you add the salt to the water:
- You should heat the water to as high a temperature as possible to facilitate dissolving the salt. 140 deg F is ideal, but the heating controller in this build only goes to 104 deg F.
- Put in one bag of salt and dissolve it – note the severe temperature drop from adding 1 bag of salt.
- do not add more salt until the temperature returns to your set point. If you put in too much cold salt at once, you will have un uphill battle at warming the water and dissolving the salt.
- You are aiming for a specific gravity of 1.23 to 1.3 – if your head is tilting back uncomfortably or your hips are sagging down, then you need more salt.
Suggested enhancements to basic build
A non-slip mat
Get a non-slip mat with suction cups on the bottom. The floor of the tank can be slippery. And when you are in an altered state, you might be rudely brought back to consensus reality by a violent and perhaps injurious slip. We dont want that.
A halo head rest
Before I had enough salt in the my tank, my head was being pull back too far and my lower spine was being arched uncomfortably as well. I fixed the head-neck issues with the Halo head rest by Floatease.
Floating in the Ragtop DIY Tank
To enter the Ragtop, you perform the following steps every time:
- Put in some earplugs.
- Unplug the temperature controller
- Open the flap.
- Remove the water heater from the water and put into a container that can hold a potentially hot probe. When removing it, say out loud: heater removed. The reason you say this is because during the float, you will often feel certain things as nerves discharge – you will feel tingling, electrical sensations, etc. And you will think that you accidentally left the water heater in the water. But because you said “heater removed” when removing the heating element, you can recall this and continue to float with a sense of confidence.
- Get in the tank.
- Enjoy your float.
- To exit, move back to the Northwest corner of the tank and sit up. Your head will pop the flap up.
- Put your hands on the lips and stand up.
- Keeping contact with the railing, turn around
- Step out.
- Head to the shower. Dont worry about closing the tank or reactivating the heating system now. Simply get to the shower and enjoy the warm shower.
- Put the water heater back in the tank, well away from the temperature probe.
- Turn on the temperature controller.
- Enjoy your planetside trip until the next float.
Reflections, Commentary and Scope for Improvement
Make sure the tank you buy is NEW and in GOOD SHAPE
If the walls of the tank are warped, then that increases the chance that the tarp will not snugly fit
The height of the containment tank
In this build, the containment tank height is 24″. Contrast this with the Black Beauty where the effective height was 32″ because 2 16-inch containment tanks were stacked.
A major concern with 24″ high is the athleticism necessary to enter and exit the tank. Two feet of height is doable for me. But for someone with back problems or someone considerably shorter than 6′ tall, then entry (and exit even more so) presents a difficulty. A possible solution is to have a step stool of some sort.
Another concern that height presents is this: the more height there is, the more unheated air that will tend to seek homeostasis with the room temperature air. But we have the Zen Float Tent as prior art – it had a 5-foot high teepee and it held temperature just fine.
For these reasons, we would probably never use this tank from Global Industrial:

This tank is 28 inches high. Which means an additional 4 inches to clear entering and exiting the tank. Perhaps a footstool or raised surface would solve this problem?
That being said, the workmanship on this tank is absolutely gorgeous:
- 2 levels of tiering within the walls
- a nice wide generous tank lip to drill holes into
A very professional company with excellent customer service and highly useable website.
But unless someone develops an easier way to enter/exit such a tank, it has to be disqualified as too high to safely enter and exit, especially given that your feet are in salty, slippery water and your hands are wet.
Tarp sag … it’s not all bad
After one has anchored the tarp, one may notice a significant sag in the tank in the Southwest region of the tarp. This tank sag is not all bad: it encourages condensation droplets to run downwards away from your face.
I “fixed” my tag sag, but now I receive an almost-daily hello from condensed water droplets.
How to fix tarp sag?
In the absence of using a more rigid material for the top of the tank, one can run ropes between anchor points to combat tank-sag. Observing your sag is the way to know how to use rope to eliminate sag.
Another approach is to add another anchor point between anchor points 2 and 4. This is what was done in the current build and is shown in this video.
The most robust way to combat tarp sag is to replace the tarp with a more rigid material such as the 8’x4′ sheets of insulation sold at hardware stores.
Creating ideal temperature in the tank water
The floor of the room can be an issue
In the apartment I am in currently, the ground floor has cold floors. The black beauty was built in a mobile home with raised floors. It may be useful to elevate the tank from the floor so that bottom of the tank is not in a game of mortal combat with a cold floor.
The temperature of the room could be an issue
In a well-insulated top-quality passive floatation tank such as the i-sopod or dreampod, the room temperature does not plummet the water temperature. However, the floor issue combined with a room temperature that is at or below 82 deg F leads to a noticeable drop in water temperature about 30 minutes to 1 hour into the float.
Sometimes, at this point, the desire for more relaxation is so great that I simply allow myself to find a new homeostasis point below the original one. Other times I get out. Sometimes I slosh the water around in hopes of find a warm pocket.
If you can house the tank in a small room that you can force the temperature to be 94 deg F AND if you are not in mortal combat with an abnormally cold floor, then the water temperature should remain at 94.
One thing leads to another
If you fix the mortal kombat battle between a cold floor and the bottom of the tank by raising the tank, then it will be harder to enter and exit. One thing leads to another.
My temperature controller is …. OK
The H2Pro temperature controller heats well. I use a set point of 95 deg F. Regular observation of the temperature has shown that the controller maintains the temperature between 94 deg F and 94.8 deg F. However:
- they dont specify the sensitivity of their controller
- you cannot call for customer service. Ming LLC makes the controller, but all that happens when I call is I get hung up on.
- there is no light that goes on when the water is being heated, so there is no way to know when it decides to turn off an on.
I would certainly shop hard for something that addresses the above pain points if building another one of these tanks. Here is some expert feedback on temperature controllers:
Comment
byu/thedeepself from discussion
inFloatTank
Comment
byu/thedeepself from discussion
inFloatTank
Out of sight, out of mind
While on the topic of submersible heaters, I must admit that more than once I have turned the temperature controller back on but forgot to put the heating element in the water. Then about 30 minutes later, I smell plastic melting in my apartment. Or I hear something bubbling and frying but I’m not cooking anything – the heating element was cooking the plastic basket I was using to hold the heating element while floating.
So, you really need the heating element visually close to the power switch. This way, when you go to turn on the power switch, you will see the heating element and not forget to grab it and put it in.
Extended, continuous floating is hampered
One of the interests of the builder of this tank is extended continuous floating – floating 24/7 for days or weeks. Manually adding and removing the water heater distracts one from just floating. Having the temperature drop because the tank is passively heating is another distraction.
But some pretty epic things happen in the limited float time (approximately 1 hour) I do get with this build.
While I dont personally endorse the idea of heating water while floating, there are some good aquarium heaters that are covered in a heat guard that could be used for this purpose. I mean, when was the last time you heard of fish being electrocuted by a heating controller going wackamole? If you want longer floats and want to eliminate the hassle of adding and removing the heating element, then finnex and aquatop make some good looking submersible heaters. .. and if you cant get a single 1000w heater, then get 2 500w heaters.
The Spa Pack (pump and filter): what options do we have?
The pump I am currently using has drawn heavy, yet valid, criticism:
- the pump and the little tube do not create the strong water flow necessary to pull in all the water. And it also lacks the power to pull in surface debris. What is needed is a 1HP pump that circulates 40GPM (gallons per minute).
- clear water has many measurable characteristics:
Two sections on this website may help
If you look at the list of built tanks on this site you can see what they used. Barbara Cherington’s build comes to mind.
You can also surf through the spa pack category of blog posts to see various observations about pumps and filters.
Pond filtration system
A floatation tank has a lot of close cousins – ponds, pools, aquariums, and hot tubs to name a few. The filtration systems used in these devices can be repurposed for isolation tanks.
A pond filtration system such as those available at The Pond Guy has proven viable for some DIY tankers. I read this in one of the facebook floatation tank groups but I dont remember which one.
Adding ions to the water
Fluid float has a wonderful device that adds Copper, Zinc and Silver to the water. We all know the power of sanitation that can come from these elements. If you have the extra $500, I think it makes a great addition. The Pond Guy has one as well.
Ventilation occassionally presents an initial issue
In some of my floats, I feel a lack of air. While it usually is in the first 10 minutes or so, there was one occassion where the waking state awareness of lack of air merged with the current dream I was having in the tank, later in the float. I pop open the top for just 5 or 10 seconds and that lets in enough air for the rest of the float. I have not kept track of the length of my floats. When the set point of my temperature controller was 94, my floats would end because of noticeable water temperature drop. However, at 95, I float until I am satisfied, which seems to be about 45 minutes to 1 hour.
Replace the tarp (tank cover) with…
Bubble wrap?!
One of the best DIY tank designs emulates a Zen Float tent. In his post, he mentions using bubble wrap to preserve water temp between floats.
Foam board insulation?!
Foam board insulation is a compelling replacement for flexible materials like a tarp. It comes in 8’x4′ sheets so we could cut down the 8′ side down to 5′ and lay a few across.
The tank lip must be straight for this to work: warping in the tank lip will lead to air leak with a rigid material like foam. Not so with a flexible material like tarp or bubble wrap.
A theoretical exploration of foam board placement has been made. Given the ventilation problems in the current build some additional space for air to leak in is welcome. So, this design definitely has promise.
Pond supplies versus aquarium supplies
During this build, I became enamoured of Marine and Reef for their large inventory, expert experience and prompt support. That being said, marine and reef is an aquarium shop and floatation tanks are bigger than most aquariums.
In the area of filtration, I am using supplies designed for 150-220 gallon aquariums. Compare that with pond equipment rated to work with 5000 gallons! The Pond Guy is one of the better places for pond supplies, including filtration.
It is worth mentioning that there are many other things related to isolation tanks and the stock equipment from those places can be useful in building a DIY tank.
Discussion threads
I posted notice of this tank in the following places and got some good feedback:
- After 90 days of daily use, I present the Ragtop DIY Float Tank – an easy, fast cheap floatation tank : r/FloatTank (reddit.com)
- (5) Float tank DIY | After 90 days of daily use, I present the Ragtop DIY Floatation Tank | Facebook
- (5) The Floating Community | After 90 days of daily use, I present the Ragtop DIY Floatation Tank | Facebook
- (5) Float Tank Buy Sell Trade | The Ragtop DIY Floatation Tank is | Facebook
Et Cetera
Photo archive
You may browse the Google photos archive for this project.
Acknowledgements
Many people helped me build this tank:
- many great comments from the reddit FloatTank group
- shot out to the fb Float tank DIY group
- Special thanks to No_Location7898 for technical guidance on hydrometers, insulation and more.
- Special thanks to MonsieurFoncyPonts for his pictures on redoing filtration for the Zen Float tent
- Lowe’s Hardware for refusing my attempt to return my 16’x20′ tarp – it was huge, I didnt think I needed it. It was just laying there and I said… “hey maybe I can just throw thing thing on there….”
Anecdotal History
First a little history:
- In 2011, I built and used The Black Beauty DIY floatation tank: it used 2 containment tanks — one as the bottom and one as the top.
- In (June?) 2024, I built a tank that I planned to be called the White Beauty. It was intended to use 2 containment tanks just as its predecessor. But the build failed. You are also welcome to browse the photos of the failed build.
- In (June?) 2024, I then created the Ragtop DIY tank, which is described in this post. It only uses a containment tank for the bottom while it uses a “ragtop” for the top, currently a tarp. I guess necessity is the mother of invention. Here I was pissed at the company that sold me me warped tanks that did not fit on each other. They sent me a replacement but that one was not so good either. Plus it was way too heavy for my friend to lift. The float experience was horrible because the top was leaking room air which was at 82 deg F. In my apartment, I cannot jack up the heat to 93 deg F (one way to make up for a make a tank that is too cold above the water). I’m grateful that Lowe’s Hardware refused to accept the 16′ x 20′ tarp that I tried to return. Just as an experiment, I slapped the tarp onto the tank and ran the zip ties through the holes I had already made. And it’s been working great.
5 comments on The Ragtop DIY Floatation Tank: version 2024